As detailed in my previous blog, scraping website data in Power Query is very simple. The aim of this article is to demonstrate how you can advance basic web scraping and pass parameters into the Power Query web connection string.
Scenario
I wanted to obtain the league table history of the English Premier League – starting from 1992 all the way up to the present day. I managed to find a very useful website that gave me all the information required but the problem was each web page equated to one year’s league table. As a result, I would have to import the data into Power Query over 20 times, hardcoding the specific web page every time.
There must be a better way surely? Is there not something in the web address that can be parameterized or a function in Power Query that can support iterations? Let’s find out……
Parameterize Web Connection
Firstly, to follow my example, you need to import the 92/93 league table data into Power Query. This can be found at:
http://www.transfermarkt.co.uk/premierleague/tabelle/wettbewerb/GB1?saison_id=1992.
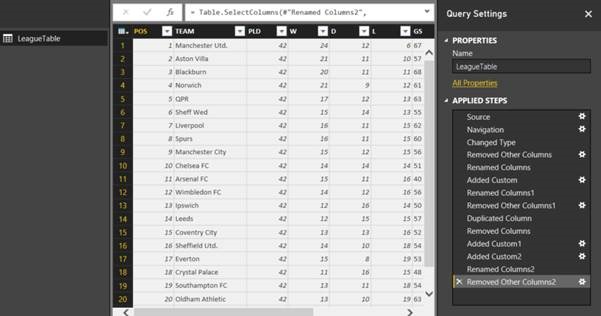
I carried out some basic formatting and ETL on the query, which is not shown in this blog. If you would like a copy of the Power BI workbook, please reply to this post. Here is how the league table looks in Power Query:
If you look at the web address link above very closely, you will see that part of the connection string contains the league table year – ‘1992’. This is what we want to parameterise. The best way to use a parameter in Power Query is to create a function. This is just like a SQL Server function, which passes variable(s) through it to obtain an end result. Instructions are given below.
1. Open the ‘LeagueTable’ query, navigate to ‘Home’ in the top menu and select ‘Advanced Editor’.
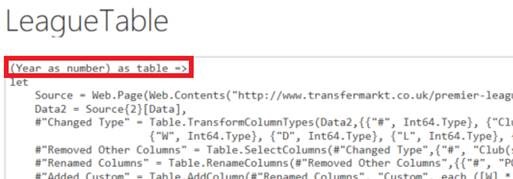
2. This will now open all of the applied steps in ‘M’ Power Query language. Firstly, we need to write the code to create the function. This is achieved by writing the following code.
Syntax:
(Year as number) as table =>
- ‘Year’ is declaring the variable to pass through, with the data type of ‘Number’. For this example, only one variable is needed.
- ‘as table’ is defining the result set based on what the function returns.
- ‘=>’ is to tell Power Query the code below is what will be contained in the function.
3. We now need to change the web connection string and pass through our new ‘Year’ variable. This is achieved by replacing the ‘1992’ part of the string.
Syntax:
Source = Web.Page(Web.Contents(“https://www.transfermarkt.co.uk/premier-
league/tabelle/wettbewerb/GB1/saison_id/” & Number.ToText(Year))),
- ‘2012’ string has been replaced with the ‘Number.ToText(Year)’ function and variable. The ‘Number.ToText’ function helps convert the variable into a string and make it readable.
- The ‘&’ is used to concatenate the web connection string and the variable together.
- The variable has now replaced the hardcoded year.
4. When you are happy with the code, click ‘Done’. Assuming the syntax is correct, the ‘LeagueTable’ query will now display an ‘fx’ symbol next to it. This illustrates that it is now a function.
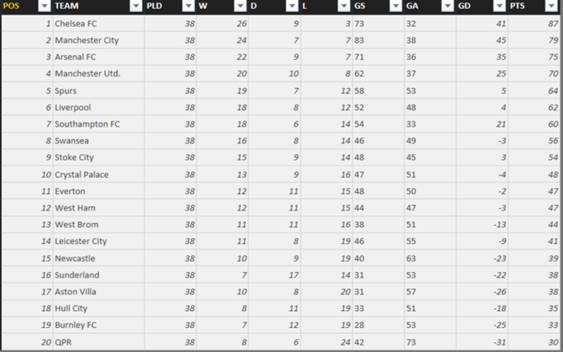
5. Finally, let’s test the function by clicking the ‘Invoke’ button highlighted in the previous screenshot. Enter your desired year and click ‘Ok’. I have chosen 2014.
6. As you can see, our ‘LeagueTable’ query has completely changed. It is showing the league table from the 14/15 season and we didn’t need to manually import this data!
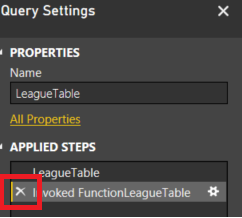
7. Before moving on, we need to remove the invoked function from the ‘Applied Steps’ menu pane. Click the ‘X‘ to achieve this.
NOTE: There is currently no way of creating a function using the user interface.
Automated Iteration
One big limitation of Power Query is the ability to iterate through values or loop through a connection string. Well, it is a problem if you want to write a native while or for loop. There is a neat workaround that call a function and loops through the parameter value based on values in a lookup table.
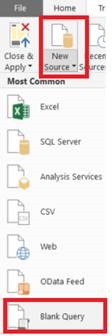
1. Let’s create a simple query by selecting New Source > Blank Query.
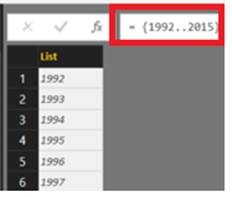
2. Type the following code into the address bar and enter Return:
The ‘1992..2015’ syntax is Power Query’s way of auto generating all year in between those dates.
3. Convert the query To Table and rename the column from ‘Column1’ to ‘Year’,
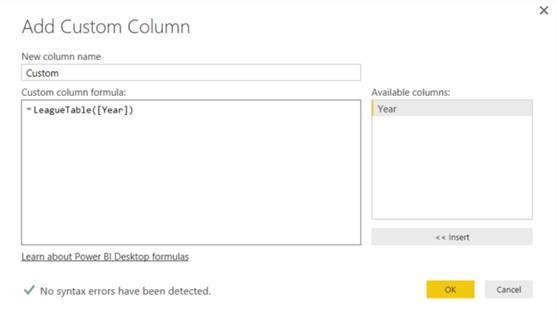
4. We now want to Add Custom Column. A new screen will pop up, where we can add some native M. We need to pass the ‘Year’ column from our table and the recently created function into the syntax. Click OK to confirm.
In effect, this is running the function against each row for the column ‘Year’.
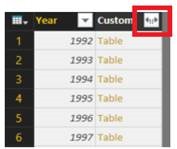
5. The query may take up to 5 minutes to complete, depending your Internet connection. Once it has completed, you will see a Table link in each of the new columns rows. Expand this column to view the data
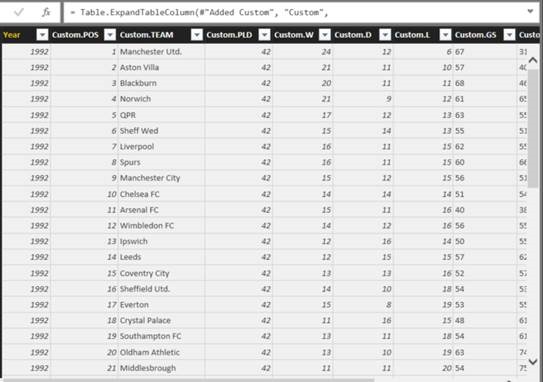
6. As if by magic, we can now see all Premier League seasons in one table! We can now bring this data back into Power BI or Excel to carry further analysis.
Future Blogs
My next couple of Power Query blogs will be looking at basic data automation/configuration and some useful ETL techniques that will prepare our data for analysis.

