Azure Machine Learning
Whilst in R you can implement very complex Machine Learning algorithms, for anyone new to Machine Learning I personally believe Azure Machine Learning is a more suitable tool for being introduced to the concepts.
Coming back to RTVS we want to execute the web service we have created.
You need to add a settings JSON file. Add an empty JSON file titled settings.json to C:UsersDocuments.azureml. Handy tip: if you ever want to have a dot at the beginning of a folder name you must place a dot at the end of the name too, which will be removed by windows explorer. So for example if you want a folder called .azureml you must name the folder .azureml. in windows explorer.
Copy and paste the following code into the empty JSON file, making sure to enter your Workspace ID and Primary Authorization Token.
{“workspace”:{
“id” : “”,
“authorization_token” : “”,
“api_endpoint”: “https://studioapi.azureml.net”,
“management_endpoint”: “https://management.azureml.net”
}}
You can get your Workspace ID by going to Settings > Name. And the Primary Authorization Token by going to Settings > Authorization Tokens. Once you’re happy save and close the JSON file.
Head back into RTVS, we’re ready to get started. There are two ways to proceed. Either I will take you line by line what to do or I have provided an R script containing a function, allowing you to take a shortcut. Whichever option you take the result is the same.
Running the predictive experiment in R – Line by line
With each line copy and paste it into the console.
Firstly a bit of setup, presuming you’ve installed the devtools package as described on the github page for the download, load AzureML and connect to the workspace specified in settings.JSON. To do this use the code below:
## Load the AzureML package.
library(AzureML)
## Load the workspace settings using the settings.JSON file.
workSpace <- workspace()
Next we need to set the web service, this can be any web service created in Azure ML, for this blog we will use the web service created in this blog. The code is as follows:
## Set the web service created in Azure ML.
automobileService <- services(workSpace, name = “Automobile Price Regression [Predictive Exp.]”)
Next we need to define the correct endpoint, this can easily be achieved using:
## Set the endpoint from the web service.
automobileEndPoint <- endpoints(workSpace, automobileService)
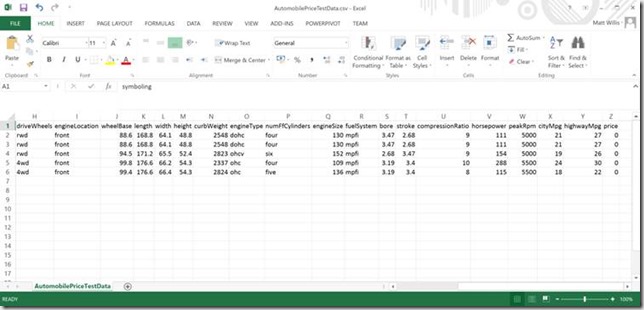
Everything is set up and ready to go, except we need to define our test data. The test data must be in the exact same format as the source data of your experiment. So the exact same amount of columns and with the same column names. Even include the column you are predicting, entering just a 0 or leaving it blank. Below is the test data I used:
This will need to be loaded into R and then a data frame. To do so use the code below, make sure the path is pointing towards your test data.
## Load and set the testing data frame.
automobileTestData <- data.frame(read.csv(“E:\OneDrive\Data Science\AutomobilePriceTestData.csv”))
Finally we are ready to do the prediction and see the result! The final line of code needed is:
## Send the test data to the web service and output the result.
consume(automobileEndPoint, automobileTestData)
Running the predictive experiment – Short cut
Below is the entire script, paste the entirety of it into top left R script.
automobileRegression <- function(webService, testDataLocation) {
## Load the AzureML package.
library(AzureML)
## Load the workspace settings using the settings.JSON file.
amlWorkspace <- workspace()
## Set the web service created in Azure ML.
automobileService <- services(amlWorkspace, name = webService)
## Set the endpoint from the web service.
automobileEndPoint <- endpoints(amlWorkspace, automobileService)
## Load and set the testing data frame.
automobileTestData <- data.frame(read.csv(testDataLocation))
## Send the test data to the web service and output the result.
consume(automobileEndPoint, automobileTestData)
}
Run the script by highlighting the whole of the function and typing Ctrl + Enter. Then run the function by typing the below code into the console:
automobileRegression(“Automobile Price Regression [Predictive Exp.]”,”E:\OneDrive\Data Science\AutomobilePriceTestData.csv”)
Where the first parameter is the name of the Azure ML web service and the second is the path of the test data file.
The Result
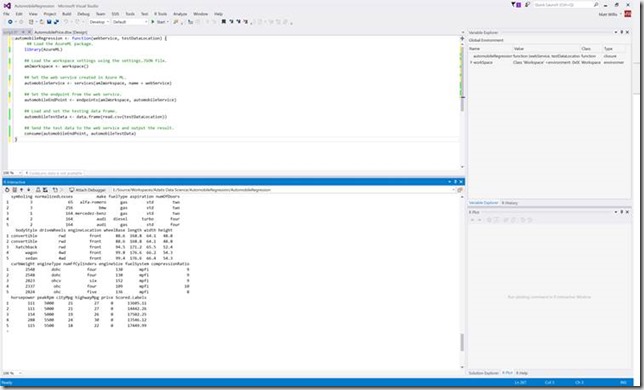
Both methods should give you the same result: an output of a data frame displaying the test data with the predicted value:
Wahoo! There you have it, a predictive analytic regression Azure Machine Learning experiment running through Visual Studio… the possibilities are endless!


