Databricks is a managed platform running Apache Spark. Spark is a fast general-purpose cluster computing system which provides high-level APIs in Java, Scala, Python and R. Spark programs have a driver program which contain a SparkContext object which co-ordinates processes running independently distributed across worker nodes in the cluster. Spark uses a cluster manager such as YARN to allocate resources to applications.
Databricks allows a user to access the functionality of Spark without any of the hassle of managing a Spark cluster. It also provides the convenience to be able to create and tear down a clusters at will.
Starting Databricks
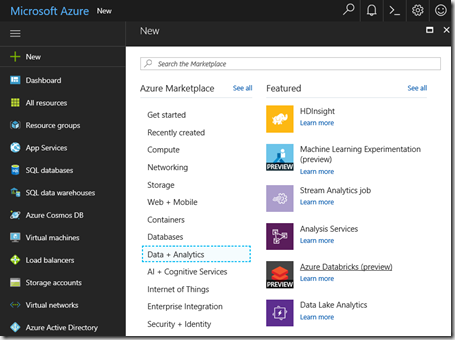
Creating a Databricks service in Azure is simple. In the Azure portal select “New” then “Data + Analytics” then “Azure Databricks”:
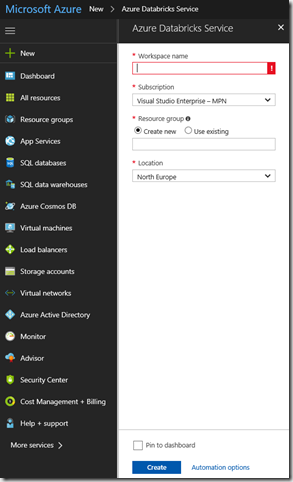
Enter a workspace name, select the subscription, resource group and subscription and click create
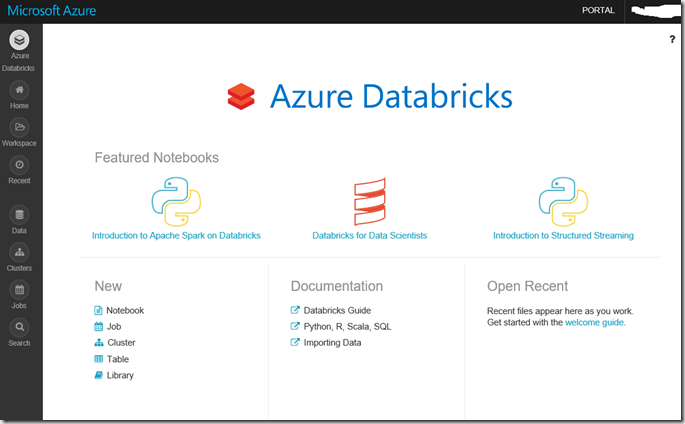
Wait a few minutes and the Service will be read for use. Clicking on the Databricks icon will take you the Azure Databricks blade. Click “Launch Workspace” to access the Databricks portal which is something of a different experience than other services in Azure, the screen looks like this:
Note the icons on the dark background on the left which are useful to jump to links
Databricks comes with some excellent documentation so take a moment to review the “Databricks Guide” documentation. We are going to start with somRemove featured imageething simple, using a notebook. When you select Notebook you will be asked for a name and to choose a language, options are Python, Scala, SQL and R. However one of the features of notebooks in Databricks is that the language is only a default and can be overridden by specifying an alternative language within the notebook.
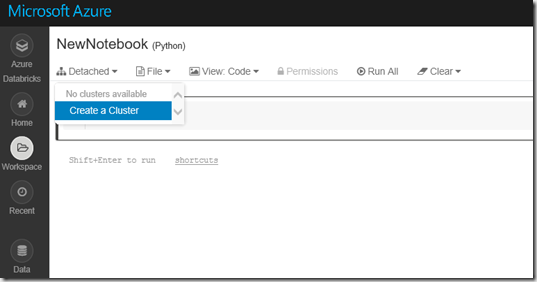
Having selected Notebook and provided a name and default language you will be presented with an empty notebook. In the top left hand corner you will see the word “Detached”. To use the notebook you you will need to attach the notebook to a Spark cluster or more if you haven’t done this before create a cluster. The dropdown on “Detached” provides this option:-
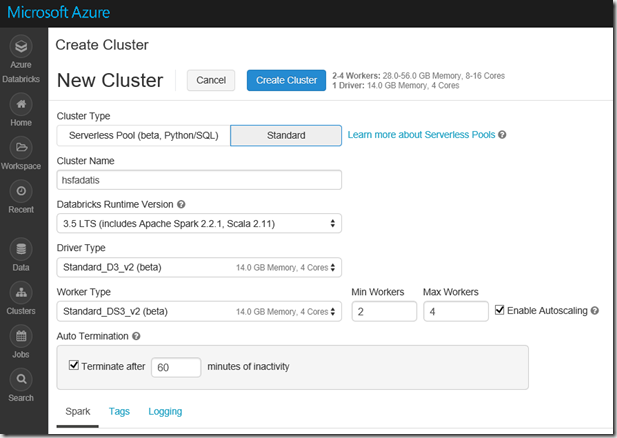
This will take you to a page such as the on below, Clearly if you are just investigating you will want to minimise the cluster size for now.
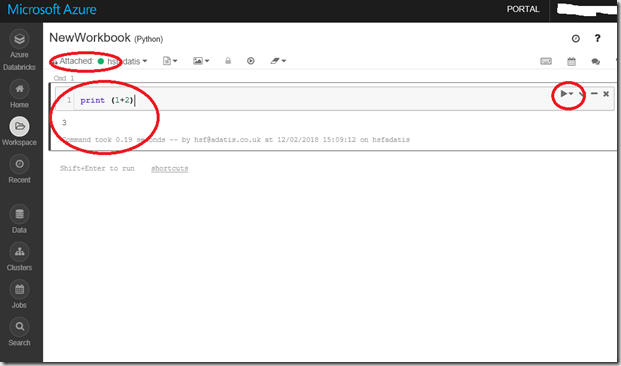
Having created a cluster (which will take a few minutes) you can navigate back to the workbook, Attach the workbook to the now running cluster, type a command and using the small arrow on the right hand size execute the command to test everything is working
What to do now, so many options. Well lets load some data and view it.
Databricks has its own file system which will have been deployed for you called the Databricks File System (DBFS). You can instead access Data Lake Store or Blob storage but for now this will do.
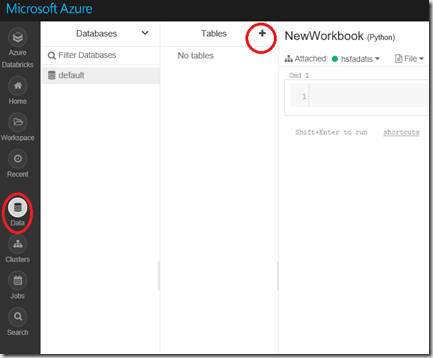
Click on “Data” on the left hand side then the “+” icon by tables. This is a little counter intuitive as it doesn’t look like it will lead to an upload option, but it does.
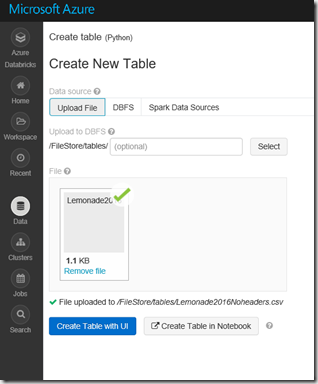
Browse to the file you want to upload, and the UI conveniently tells you where the file can be found in the file system.
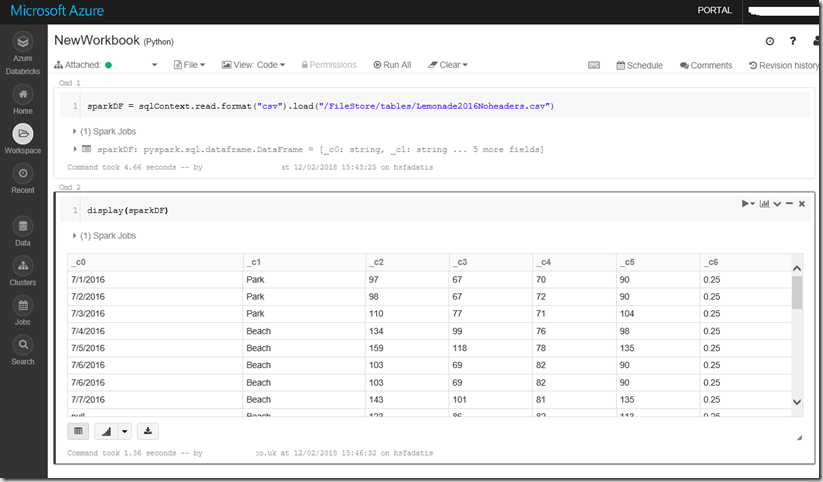
Now the file can be accessed from the notebook, the syntax differs slightly depending on what language you choose, here using python the data is read into a dataframe and then output to the screen
As the latest addition to the Azure Analytics stables Databricks comes with great promise. It’s notably well documented already despite only being in preview and the UI is mainly intuitive even if it differs in style somewhat from other Azure analytics options. If you have used Jupyter notebooks before you will appreciate the notebooks interface as a great way to dive in and investigate data. Also once its all deployed its in-memory operation makes it feel fast compared to running small queries on for instance running Hive queries in HDI clusters and USQL queries in Azure Data Lake Analytics.

